> For the complete documentation index, see [llms.txt](https://docs.spydra.app/llms.txt). Markdown versions of documentation pages are available by appending `.md` to page URLs; this page is available as [Markdown](https://docs.spydra.app/how-to/private-network/oracles/create-an-oracle.md).
# Create an Oracle
To set up an oracle:
1. Go to the network details page by clicking on the network name from the network tab.
2. On the left menu, select the '**Oracles**' option.
3. Click on **Create Oracle** to begin the process of creating a workflow in three simple steps.
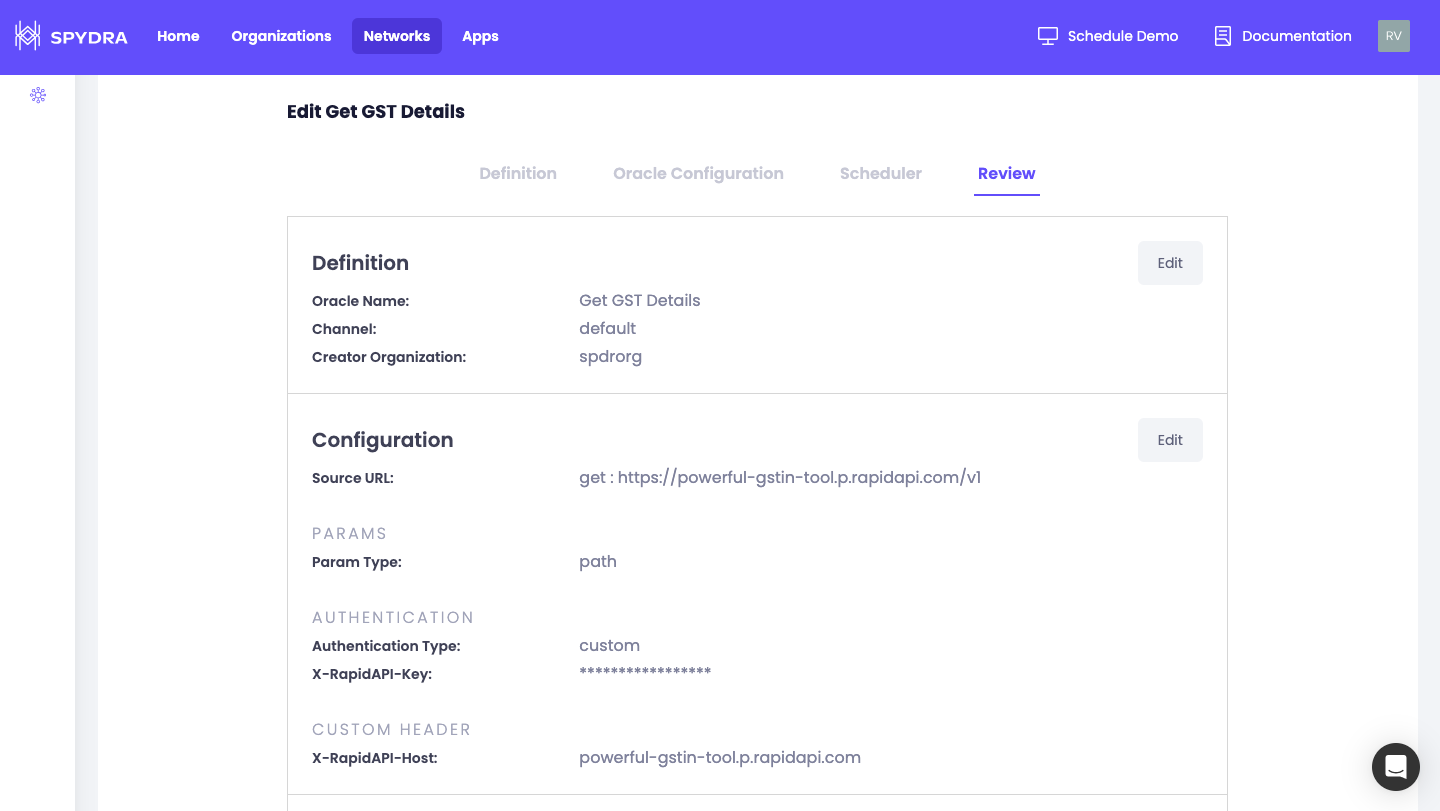
#### Step 1: Oracle Definition
1. Add the name of the Oracle.
2. Select the channel where the Oracle should be deployed.
3. Select the organisation that will own the Oracle.
#### Step 2: Oracle Configuration
1. Select the type of URL and enter the source URL.
2. Select the type of param between Query, Path, Body, and None.
3. Select authentication type for the source URL between basic, custom or none
* If authentication type is basic, enter the username and password
* If authentication type is custom, enter custom key value pair(s)
* If authentication type is none, no authentication is required to use the source URL
4. Enter custom header (optional). Click on "Add New" to add key-value pairs as custom headers.
#### Step 3: Oracle Scheduler
Adding a scheduler is an optional step. You can add a scheduler at a later stage. An oracle can have multiple schedulers.
1. Enter the cron expression
1. minutes- \
Allowed value: `0-59` \
Allowed special characters: `, - * /` \
**Example**: \ 10 for 10th minute of an hour, \
Ranges: 1-10 for first 10 minutes of an hour, \
List: 1-10, 30 for first 10 minutes and 30th minute of an hour, \
Steps values: 0-59/2 for every 30 minutes \
Unrestricted: \* for all possible values
2. hours-\
Allowed value: `0-23` \
Allowed special characters: `, - / *`
3. days (month)-\
Allowed value: `0-31` \
Allowed special characters: `, - / *`
4. months-\
Allowed value: `0-11` \
Allowed special characters: `, - / *`
5. day(week)-\
Allowed value: `0-7` \
Allowed special characters: `, - / *`
2. Enter the oracle scheduler name
3. Based on the param type of the oracle, user should define the arguments
* if the param type is 'path' : provide one key-value
* if the param type is query: provide multiple key-values
* if the param type is body: use an input box to enter JSON, XML, etc.
* if the param type is none: no arguments needed
4. Select from the list of deployed apps of the channel where the oracle is defined. The selected app will consume the data. If the selected app is a custom chaincode, define the callback function name.
#### Step 4: Review
Review entered details and deploy the oracle.